


Webhooks are a mechanism for automatically sending data between websites and applications when certain events occur. The data is sent in an HTTP request: one application sends it over the internet to a predefined address in another.

Webhook capabilities
In FLOWIN, webhooks work with forwards. They can be triggered when a message appears, is edited, deleted or pinned in the original chat (the source), or when a button is clicked in the chat that receives forwarded messages (the destination).
This lets you connect FLOWIN to social networks, exchanges, spreadsheets and CRM systems (systems for managing customer relationships). This connection is called an integration and lets you:
- Automatically add requests from Telegram to a CRM system.
- Send trading signals from Telegram to an exchange for copy trading, which means automatically executing trades based on those signals.
- Forward messages from Telegram to other social networks.
- Copy posts and messages to Google Sheets.
- Set up an autoresponder in a bot.
For each scenario, you need to configure data reception and the desired action on the website or application side.
Creating a webhook
Let’s test a webhook using webhook.site, which provides an address for receiving data and displays incoming requests. We’ll send it the text of a new Telegram message.
This requires a configured and running forward in FLOWIN.
For your first test
Use a separate test chat and a fictional request. Sending just the text is enough for the test, without names, phone numbers or other personal data.
Open @flow_in_bot, send the
/startcommand, and click “Control panel”.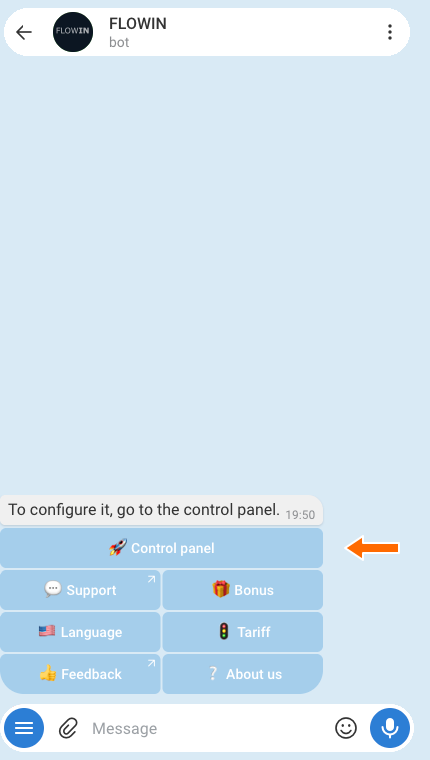

Accessing the control panel through @flow_in_bot. Open webhook.site in a separate tab. Copy the address for receiving requests from the “Your unique URL” field.
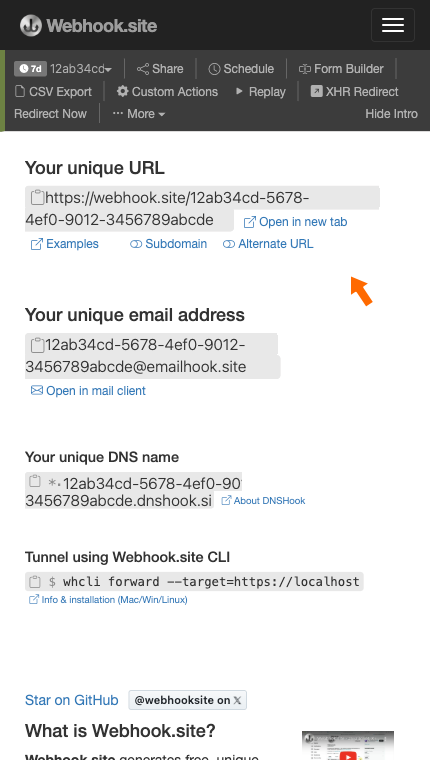
Address for receiving the test request. In the FLOWIN panel, open “Menu” → “Webhooks” and click “Create”.
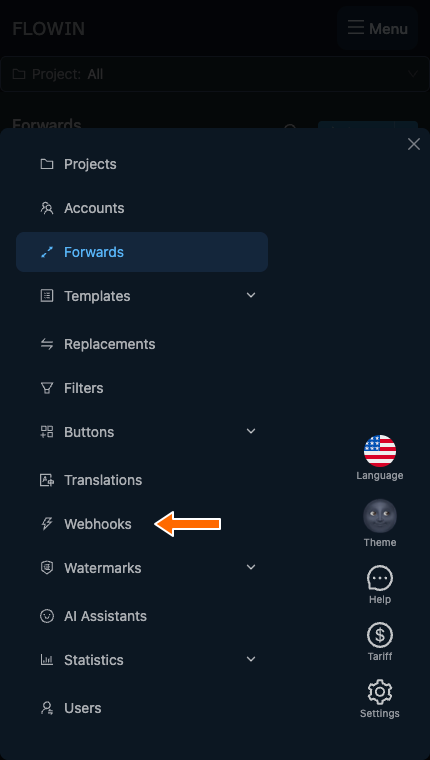
The “Webhooks” section in the FLOWIN menu. 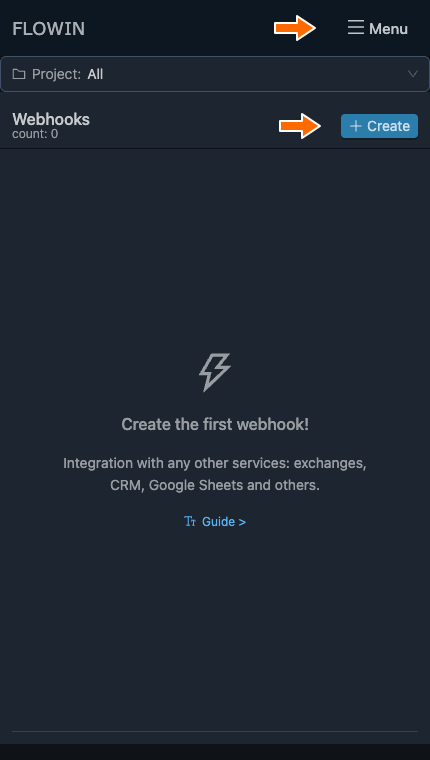
Creating the first webhook. Paste the copied address into the top field. In “Body request”, enter
{"message":"<message-text>"}and click “Create”. This is a template for the data to send: FLOWIN will replace<message-text>with the message text, which the recipient will see in themessagefield.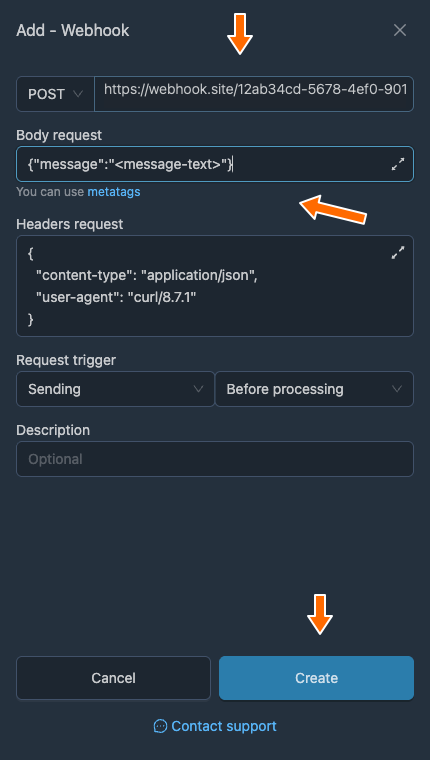
Address and body of the test request. Click “Apply” next to the webhook you created. Select the forward you need and click “Save”.
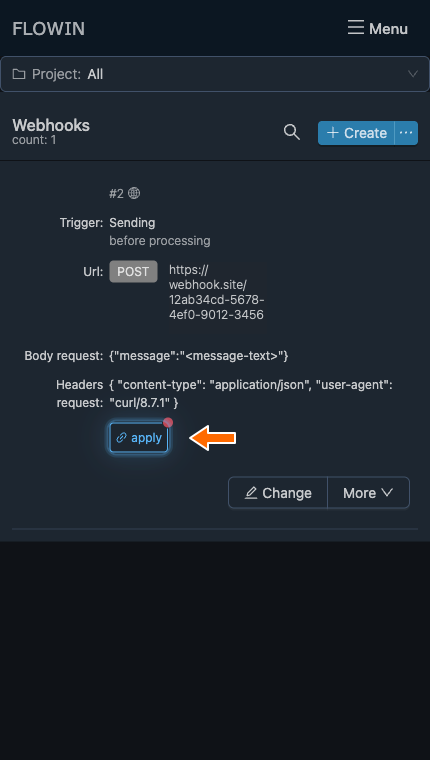
Connecting the webhook to a forward. 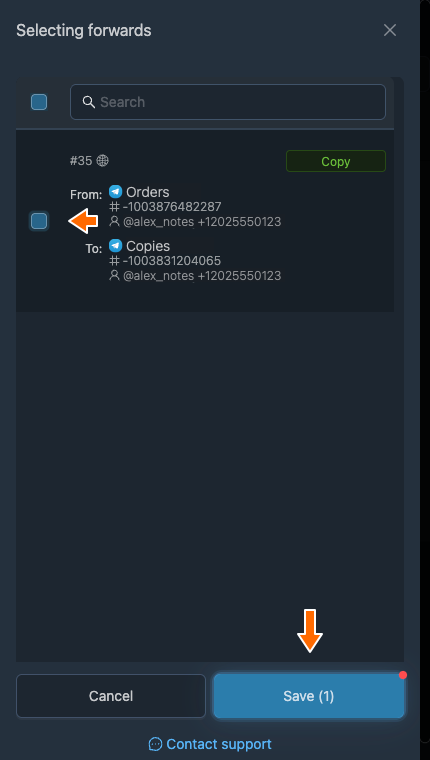
Selecting a forward for the webhook. Send a test message to the source chat, for example, “Request #1042: I need a furniture catalogue.” Return to webhook.site: the first received request will open automatically. In the “Request Content” section, the
messagefield will contain the request text. FLOWIN will now automatically send the text of every new message to the specified address before forwarding it to the destination chat.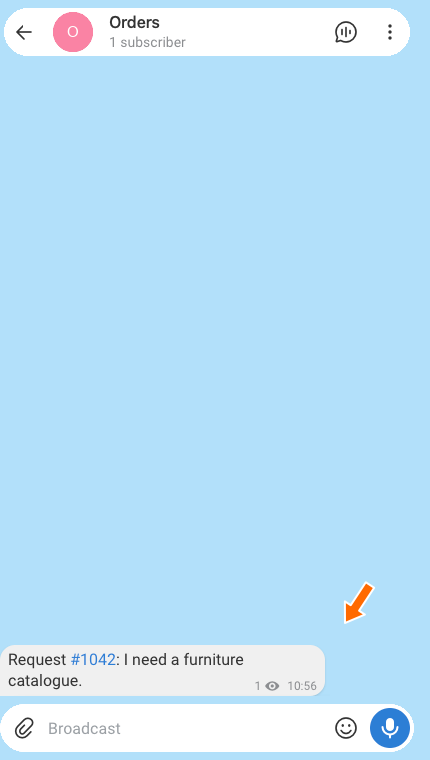
Test request in the source chat. 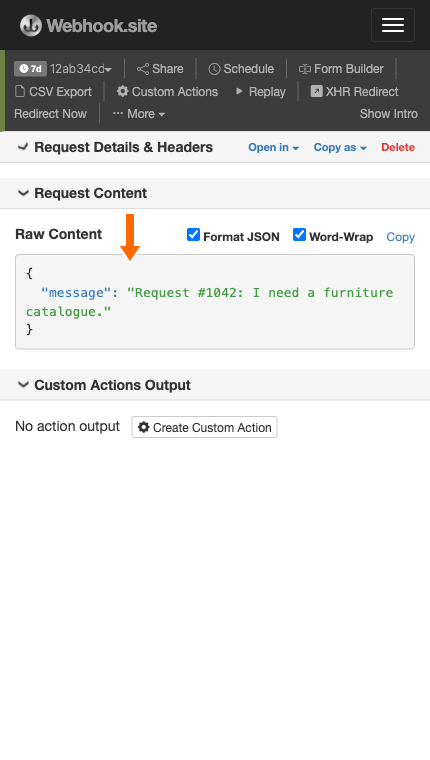
Request text received on webhook.site.
Webhook settings
Using the webhook we created, let’s look at how to change its settings and what each field means.
Where to find the settings
To connect another website or application, use its documentation. The rules for receiving data are usually in the API section, which describes how it interacts with other programs. It specifies the address, HTTP method and data format needed to fill in the fields below.
How to change webhook settings
In the “Webhooks” list, click “Change” next to the webhook you need.
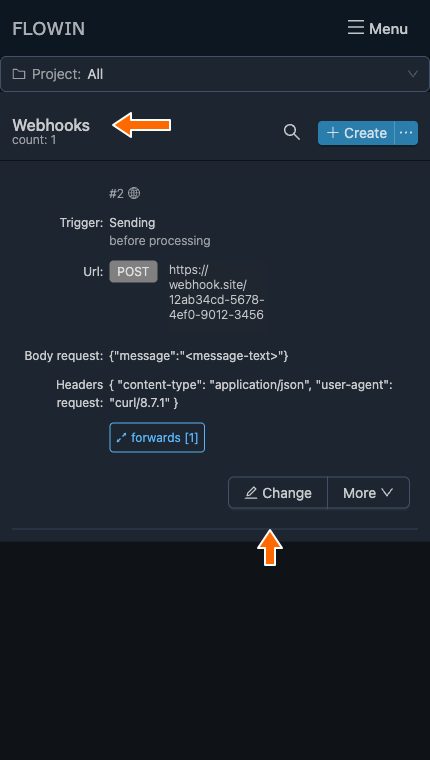
Opening webhook settings. Change the fields you need and click “Save”.
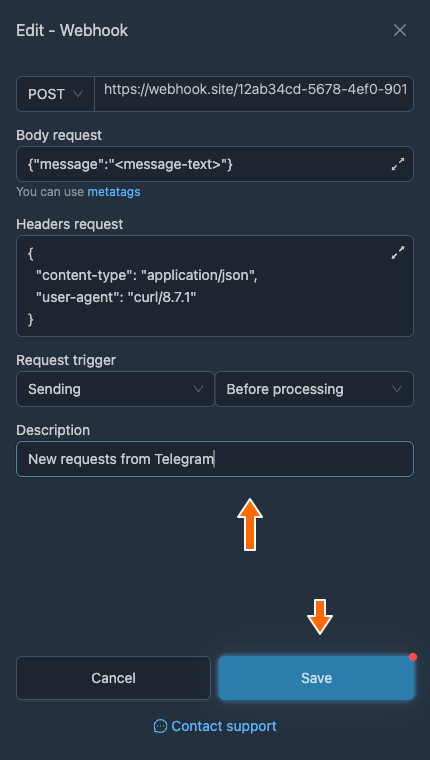
Saving the changed settings. 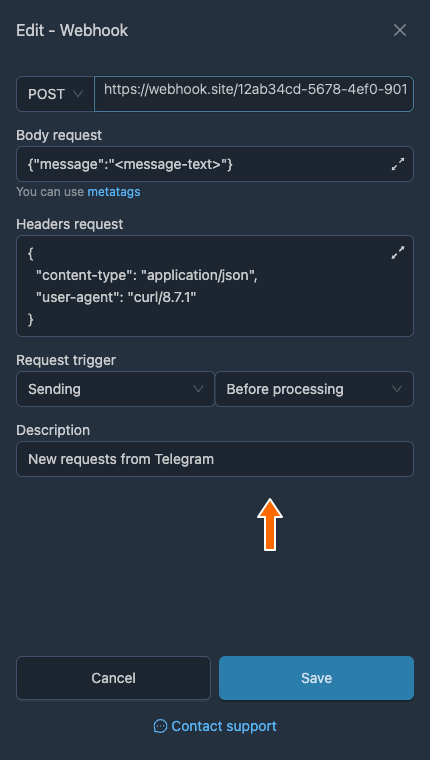
Description saved in the webhook settings.
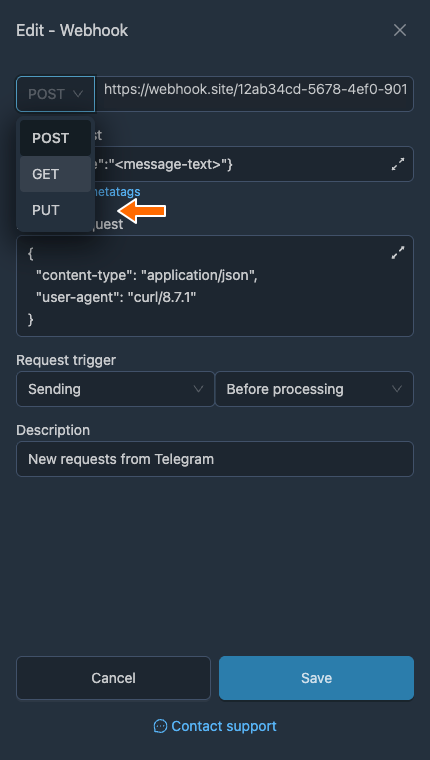
HTTP method
The HTTP method defines the request’s action: POST sends data for processing, GET requests data, and PUT replaces it. POST is selected by default and is suitable for our test. For another website or application, choose the method specified in its documentation.
URL
A URL is an address on the internet. Enter the address for receiving data provided by the website or application you are connecting. In our example, webhook.site provided it.
Body request
The request body contains the data to send in JSON format: “field name: value” pairs. The fields depend on the requirements of the website or application you are connecting.
Meta tags are placeholders that FLOWIN replaces with message data. For example, <message-text> is replaced with the text, and <author-name> with the author’s name. You can also open the list of meta tags using the “metatags” link below the field.
The user, message, chat and topic numbers in the list below are their Telegram identifiers (IDs).
Message and author
- Message text:
<message-text>. - Message date:
<message-date>. - Message time:
<message-time>. - Author ID:
<author-id>. - Author name:
<author-name>. - Author name as an HTML link to their profile:
<author-name-link>. - Author name as a hashtag:
<author-name-tag>. - Author username:
<author-username>.
Source
- Message text:
<src-message-text>. - Message ID:
<src-message-id>. - Message link:
<src-message-link>. - Chat ID:
<src-chat-id>. - Chat name:
<src-chat-name>. - Chat username:
<src-chat-username>. - Topic ID:
<src-topic-id>. - Topic name:
<src-topic-name>.
Destination
- Message text:
<dst-message-text>. - Message ID:
<dst-message-id>. - Message link:
<dst-message-link>. - Chat ID:
<dst-chat-id>. - Chat name:
<dst-chat-name>. - Chat username:
<dst-chat-username>. - Topic ID:
<dst-topic-id>. - Topic name:
<dst-topic-name>.
The destination message’s ID and link become available after forwarding. To send them, select “After sending” in “Request trigger”.
Click button
- ID of the user who clicked:
<clicker-id>. - Name of the user who clicked:
<clicker-name>. - Button data:
<clicker-data>. - Click date:
<click-date>. - Click time:
<click-time>.
Selecting text
- A regular expression defines a rule for finding text. For example,
<regexp>(short|sell)</regexp>inserts the first match forshortorsell. - Random text
<random>1|2|3|4|5</random>inserts one of five options. You can put your own options between the tags, separated by the|character.
Headers request
“Headers request” contains information the recipient uses to handle the request. For example, an access key lets it check who sent the request. Headers are specified in JSON format. This field usually does not need to be changed; get the required values from the documentation of the website or application you are connecting.
Request trigger
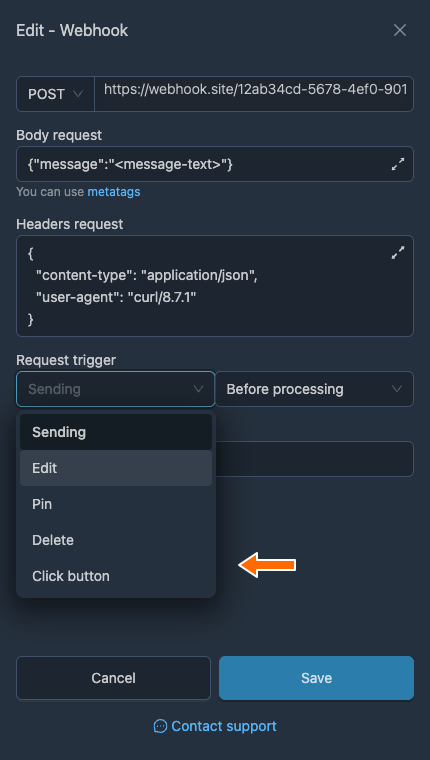
“Request trigger” determines the event and the point at which the webhook sends a request to the specified address. You can choose from these events:
- “Sending” is selected by default. The webhook is triggered when a new message is forwarded.
- “Edit” is triggered when a message edit in the source is processed.
- “Pin” is triggered when a message being pinned in the source is processed.
- “Delete” is triggered when a message deletion in the source is processed.
- “Click button” is triggered by callback buttons in the destination chat. This type of button notifies the bot that it was clicked and sends the data assigned to it. An ordinary button with a link does not trigger this webhook.
The timing determines the stage of forwarding at which the request is sent:
- “Before processing”: the request is sent before the message is translated or processed by artificial intelligence (AI).
- “After processing”: the request is sent after translation and AI processing.
- “After sending”: the request is sent once the message has been successfully sent or edited in the destination chat.
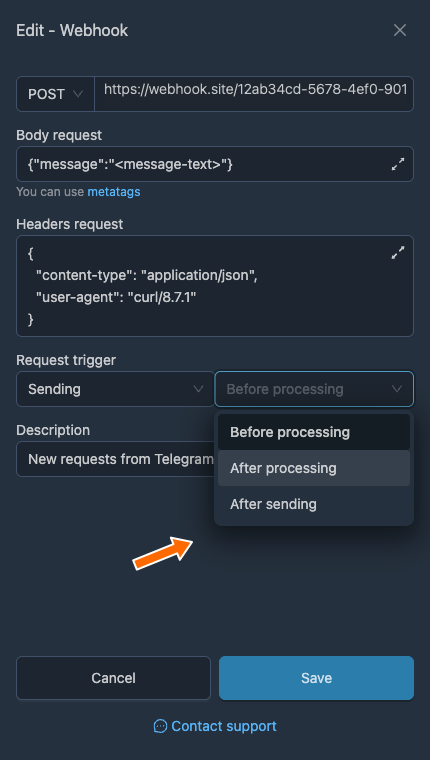
Available timing options
All three options are available for “Sending” and “Edit”. “Pin”, “Delete” and “Click button” use “Before processing”; you cannot choose a different point in time.
Description
“Description” is a comment for your convenience and does not affect how the webhook works. You can leave it blank.
Available webhook actions
You can manage the webhooks you have created in the “Webhooks” list:
- “Change” opens the webhook’s main settings.
- “Duplicate” in the “More” menu creates a copy of the webhook’s settings.
- “Select project” in the “More” menu adds the webhook to a project.
- “Delete” in the “More” menu deletes the webhook.
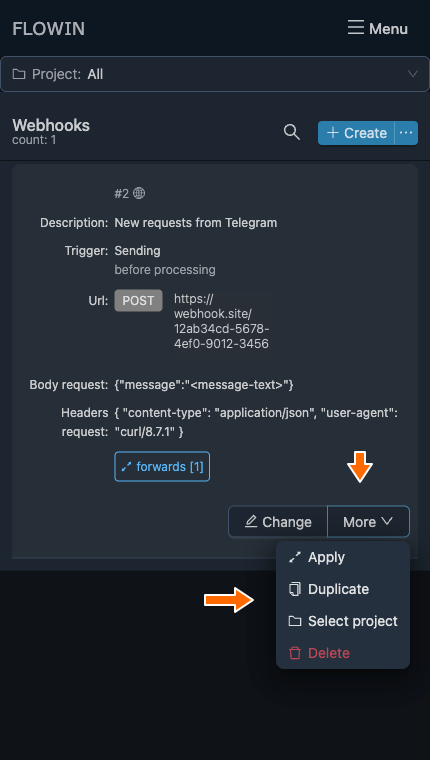
Each webhook also has a “Forwards [N]” button, which opens the selection of forwards it applies to. N is the number of selected forwards. If no forwards have been selected yet, an “Apply” button is shown instead.
Frequently asked questions
What is a webhook in simple terms?
It is a way to automatically send data to another application when a certain event occurs. For example, when forwarding a new message, FLOWIN sends its text to the address you specify using an HTTP request. Here, FLOWIN sends the request; the Telegram method setWebhook sets up the other direction: delivering updates from Telegram to the program that runs the bot.
Is entering the CRM’s address enough?
No. You need the address for receiving data from the CRM’s documentation, along with the appropriate HTTP method, JSON fields and headers if they are required for access. The CRM’s ordinary website address will not work for this. FLOWIN sends the request; creating a request record or performing another action depends on how the CRM processes the received data. The field values are described under “Webhook settings”.
Why is the destination message link empty?
Until a new message has been successfully sent, FLOWIN does not yet have its ID or link in the destination. To send <dst-message-id> and <dst-message-link> select the “Sending” or “Edit” event and “After sending” in “Request trigger”. Links are generated for channels and supergroups. For a private chat or a basic group, <dst-message-link> will remain empty even after sending.
Can an ordinary URL button trigger a webhook?
No. An ordinary URL button opens a link. The “Click button” event requires a callback button in the destination chat: it sends data about the click to the bot. This distinction is explained under “Request trigger”.
How can I check that the external service received the data?
Send a fictional message and check the incoming request on the service’s side. In the webhook.site example the request text appears in the “Request Content” section. Successful forwarding in Telegram does not, by itself, confirm that the external service accepted the data or performed the desired action. Text without names, phone numbers or other personal data is enough for the test.