


Setting up automatic replacements in the text of forwarded messages lets you add signatures to messages, remove ads, replace links, apply formatting and more.

What replacements can do
The FLOWIN service lets you automatically change the content of forwarded messages to give them the form you need. For example, you can use replacements to:
- Add any signatures anywhere in a message.
- Remove any unwanted content from a message.
- Replace links, words, identifiers, numbers, contacts or entire phrases.
- Insert any metadata about a message into the message text itself: the author's ID, the author's name, a link to the author, a link to the original message, the time and date of the original message, the source name and more.
- Apply formatting to individual words or phrases.
- Fit the data from a message into a specific fixed template, completely changing the text's structure.
Creating a replacement
Let's look at the basic replacement features using a simple task: replacing the word “car” with “airplane” in all forwarded messages.
Before you begin
Before creating a replacement, make sure you already have a forward set up in Copy mode.
The steps below show how to create and configure a simple replacement:
Open @flow_in_bot, send the
/startcommand, and click “Control panel”.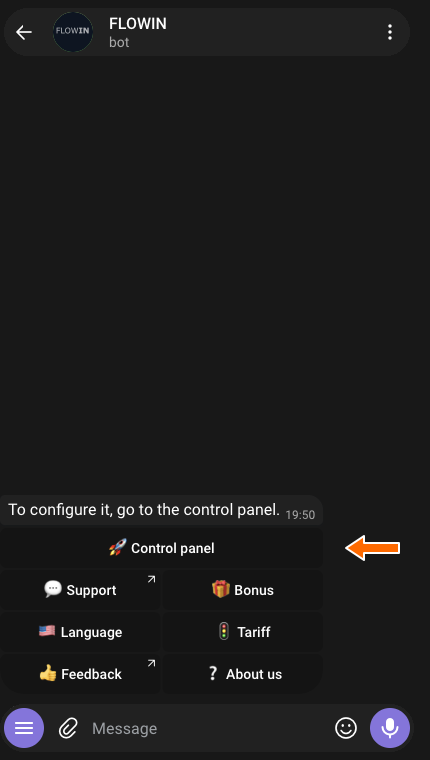

Accessing the control panel through @flow_in_bot. - If the menu on the left is not visible, click “Menu” in the top right corner. Then select “Replacements” and click “Create”.
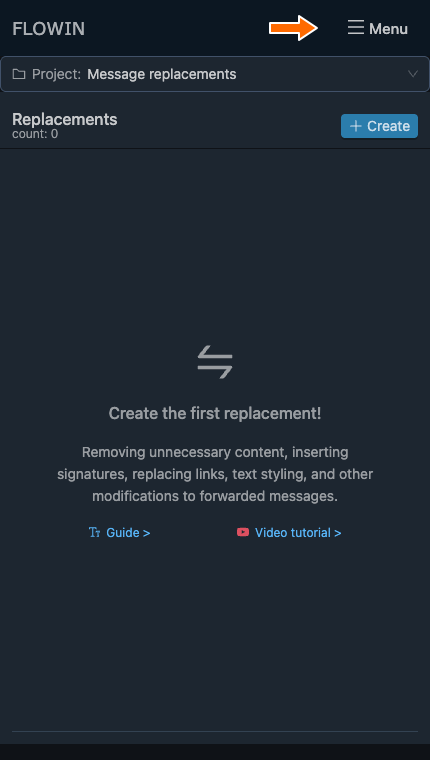
The “Menu” button in the top right corner. 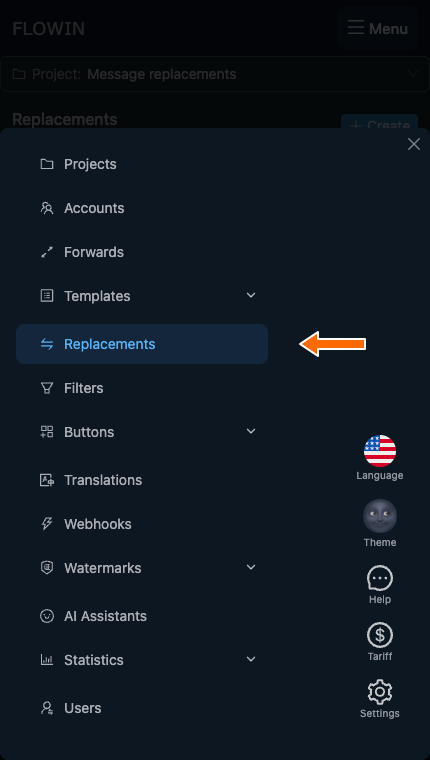
The “Replacements” section in the FLOWIN menu. 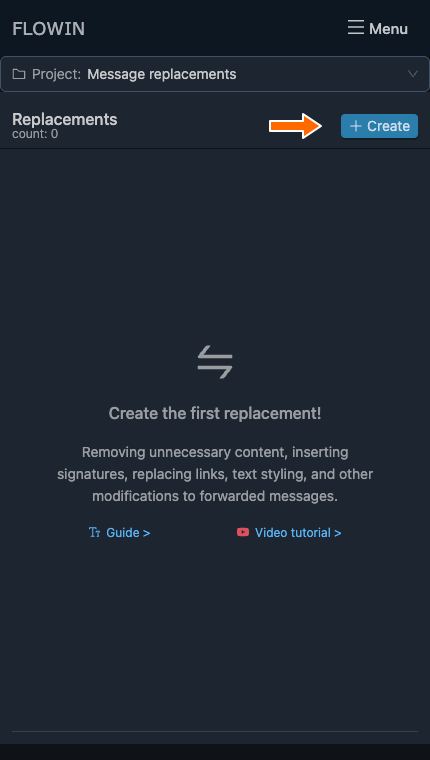
Creating a new replacement. - In the “Search” field, keep “Text” mode and enter
car. In the “Replace with” field, enterairplane. Leave the other settings at their defaults and click “Create”.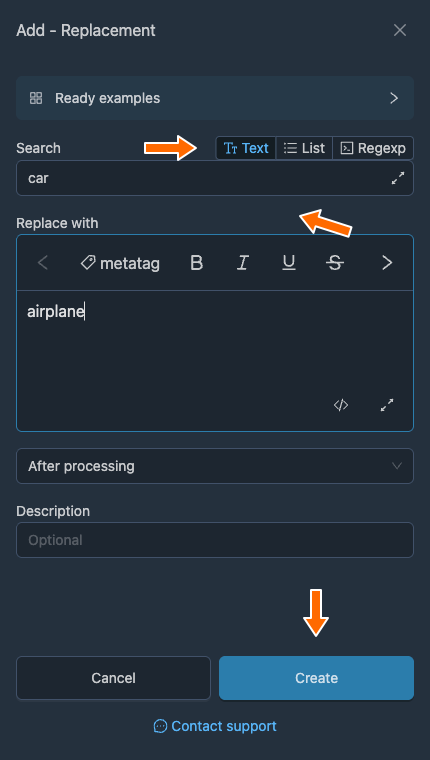
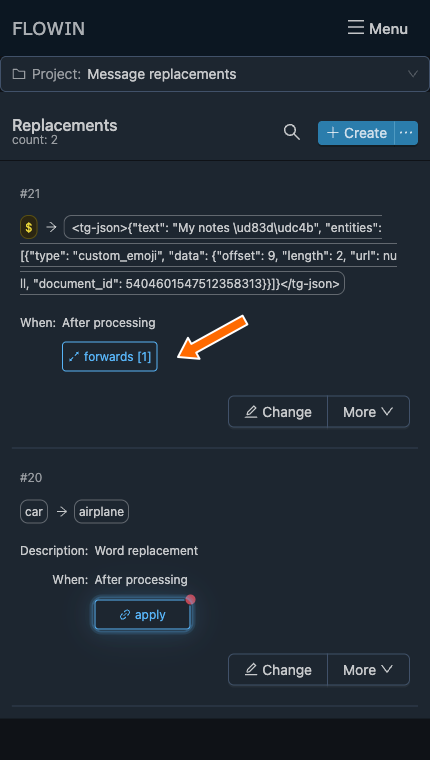
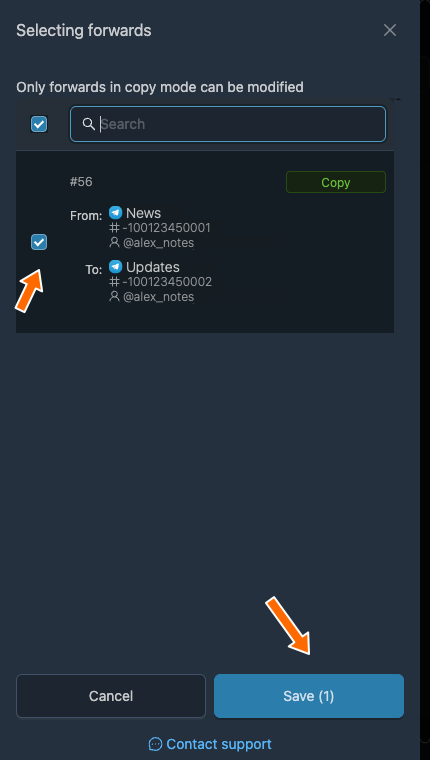
“car” is replaced with “airplane”. - In the row for the replacement you created, click the blinking “Apply” button. In the window that opens, select the forward you need and click “Save”. “Forwards [1]” will appear in place of “Apply”.
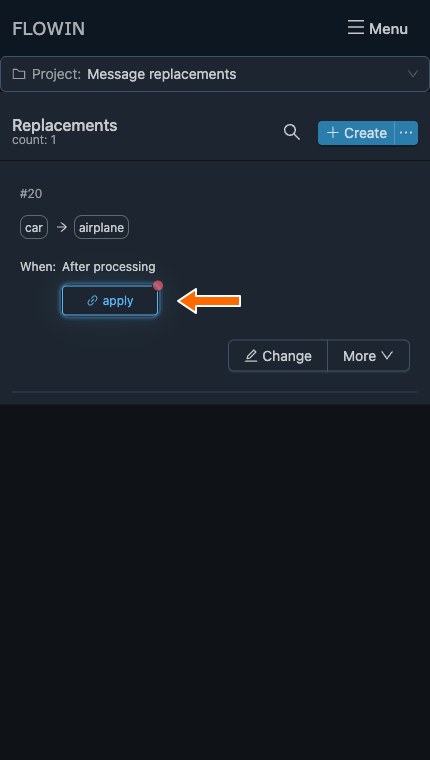
The blinking “Apply” button for the new replacement. 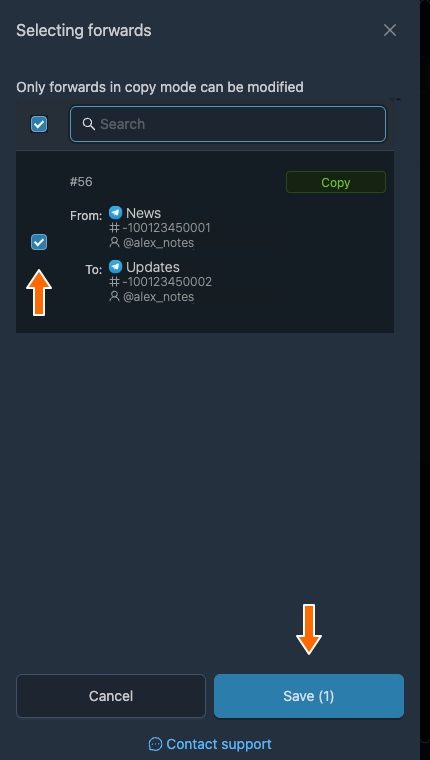
Selecting a forward for the replacement. 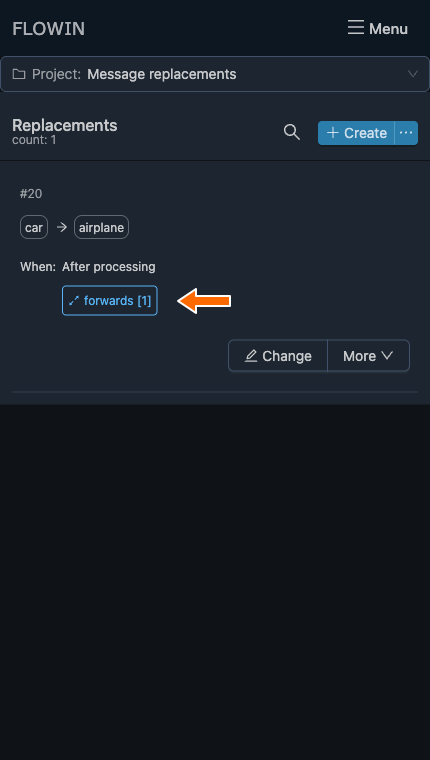
The new replacement is linked to a forward. - After you complete these steps, information about your replacement will appear in the list. The service will now automatically look for the word “car” in forwarded messages and replace it with “airplane” in the forwards selected for this replacement.
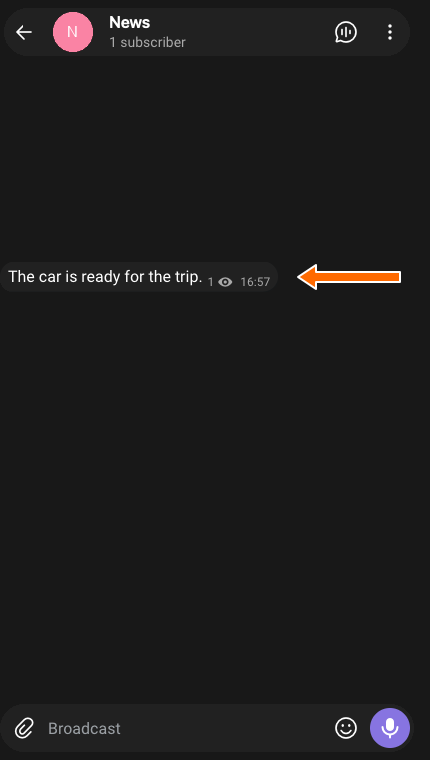
The original message containing the word “car”. 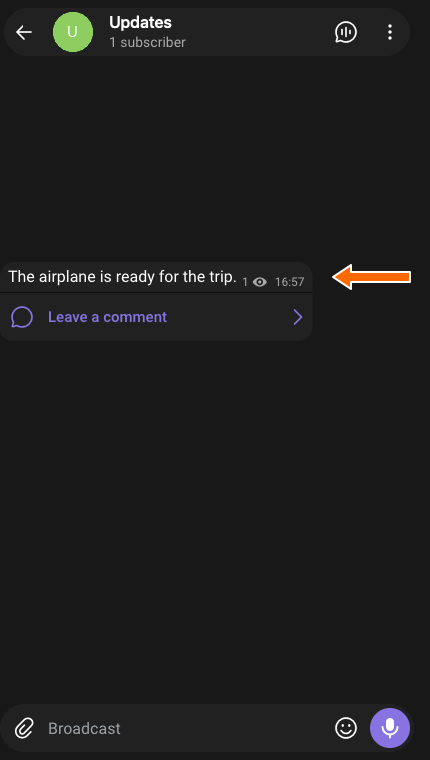
The message in the destination after the word is replaced.
Replacement settings
Let's take a closer look at replacement settings and features using the replacement we have already created.
How to edit and save a replacement
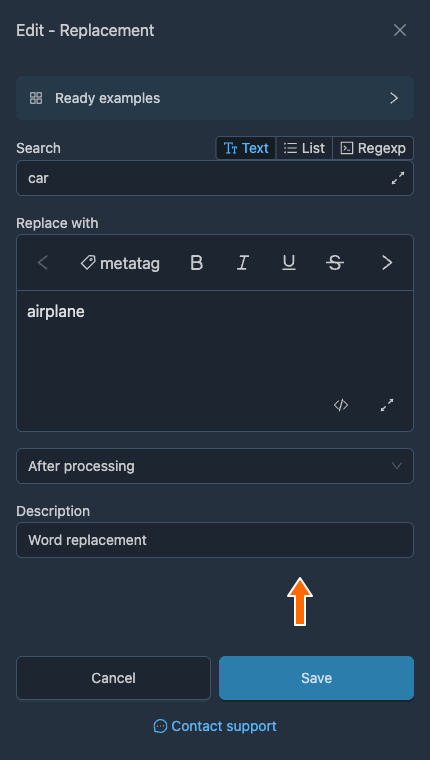
- Click “Change” in the row for the replacement you need. A window with its settings will open.
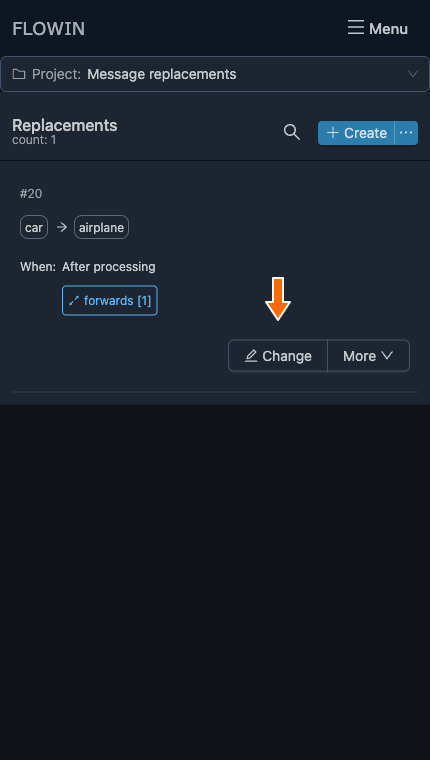
Editing an existing replacement. - Change the fields you need, for example by adding the description
Word replacement, and click “Save”. The window will close, and the new description will appear in the replacement's row.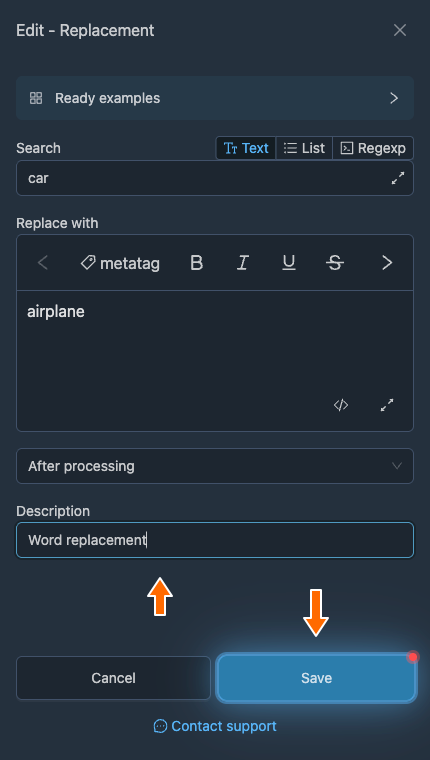
Saving the changed settings. 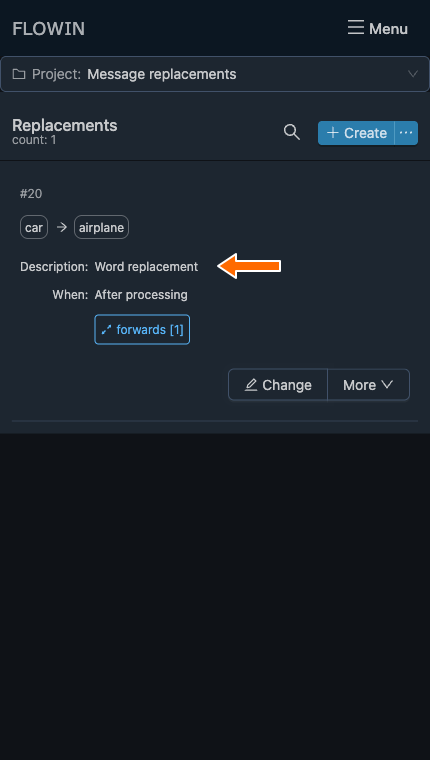
The saved settings in the replacement's row.
Fields in the settings window
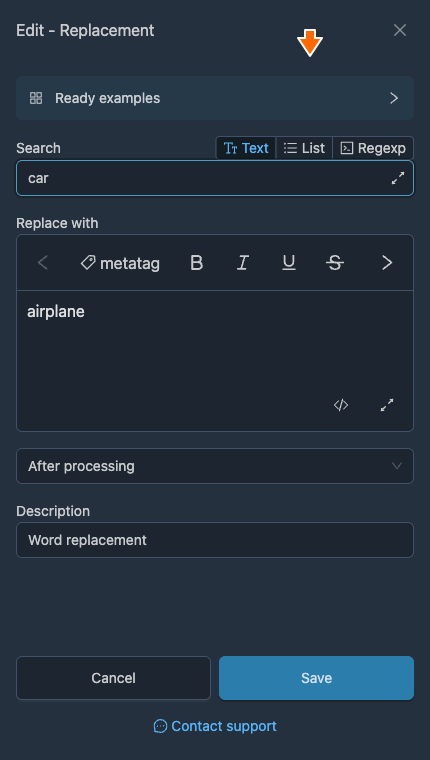
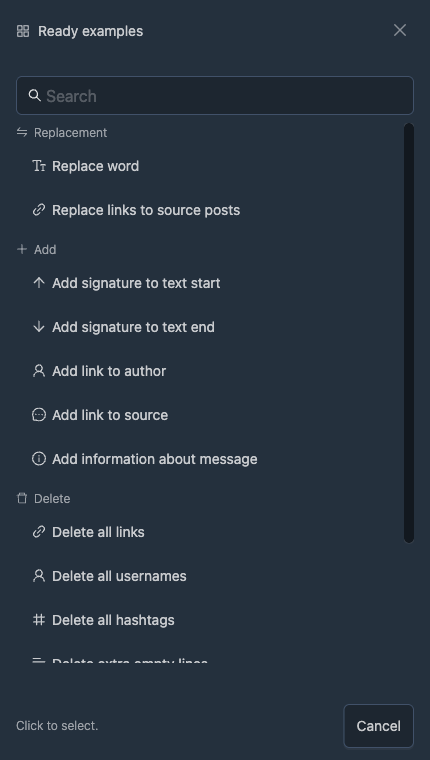
“Ready examples”: a list of the most common uses for replacements. Click a particular example to select it. The fields in the dialog will then be filled with the corresponding values from that example, leaving you only to adjust them slightly to suit your needs.
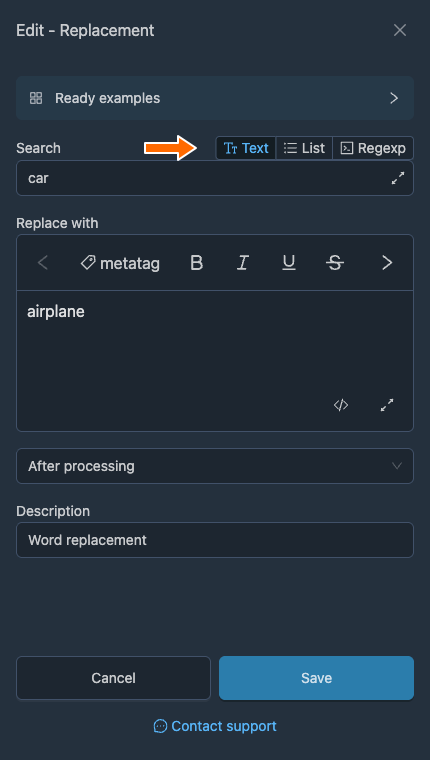
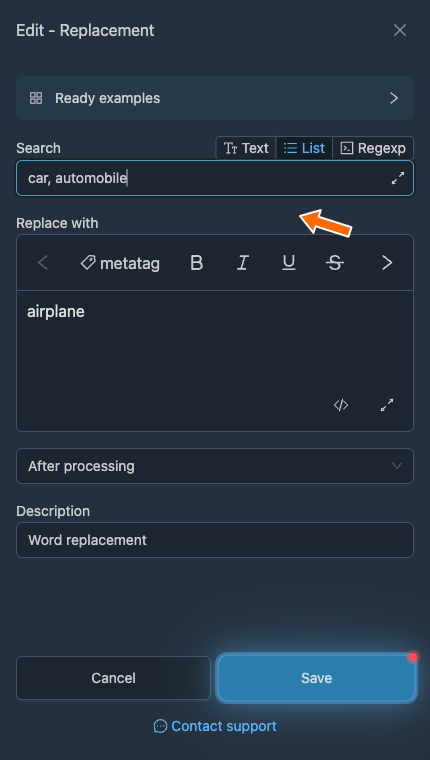
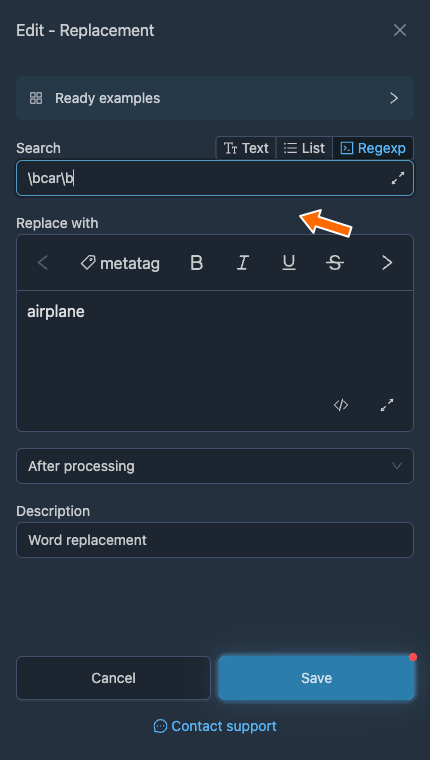
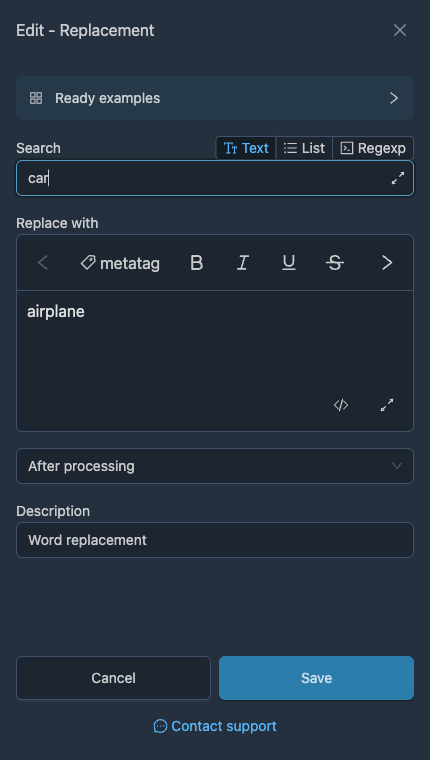
“Search”: the field for the content to find in a message and replace. There are also three search modes next to this field:
- “Text”: searches for the exact sequence of characters you entered, including all spaces, indentation, brackets and so on. Letter case does not matter.
- “List”: searches for several alternatives to find and replace. Use commas or new lines as separators. Letter case does not matter. It searches for the exact character sequences you list.
- “Regexp”: searches using a regular expression. Read more about regular expression syntax in the article “Regular expressions in filters and replacements”.
Replacing or removing text
“Replace with”: the field for the new content that will replace the old content found. In this field, you can use formatting and metatags available in the editor. If you leave this field empty, the content found will simply be removed from the message, replaced with nothing.
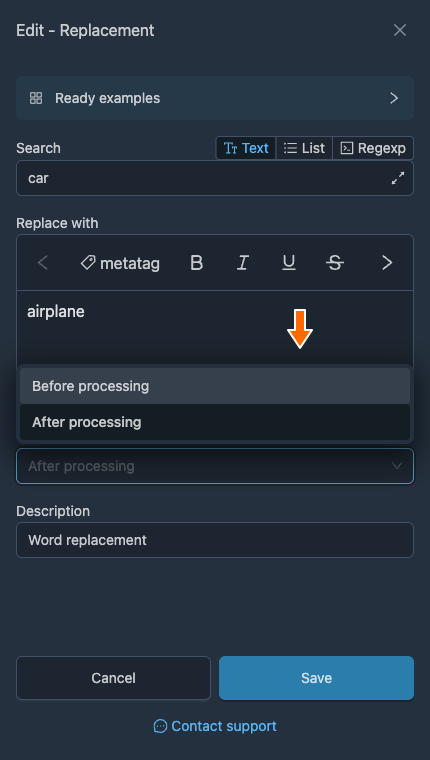
“After processing” or “Before processing”: a way to control when replacements are applied in relation to other processing steps. If you select “Before processing”, the replacement will be applied before translations, AI assistants, watermarks, merging and other replacements set to “After processing”. If you select “After processing”, the replacement will be applied after the main processing steps, before the message is prepared for sending.
“Description”: a field for a comment about the replacement. It does not affect anything and is only for your convenience. You can leave it empty.
Formatting and styles
Formatting tags
Replacements let you format and style the content of forwarded messages. In the replacement settings, you can use the following tags in the “Replace with” field for formatting and styling:
- new line: <br>
- space: <space>
- bold: <b>Hi</b>
- italic: <i>Hi</i>
strikethrough: <s>Hi</s>code: <code>Hi</code>- link: <a href="https://ya.ru">Hi</a>
- spoiler: <span class="tg-spoiler">text</span>
- quote: <blockquote>Hi</blockquote>
The “Replace with” field has a visual editor: you can apply bold, italic, underline, strikethrough, a link, inline code, a code block, a spoiler or a quote to selected text. Use the “Switch to code mode” button to enter tags.
Example: make the replaced word bold
- In the replacement editing window, apply bold formatting in one of two ways. In the visual editor, select
airplaneand click “bold”. If you prefer to enter tags manually, click the “Switch to code mode” button at the bottom of the field and replace the field's contents with<b>airplane</b>. Click “Save”.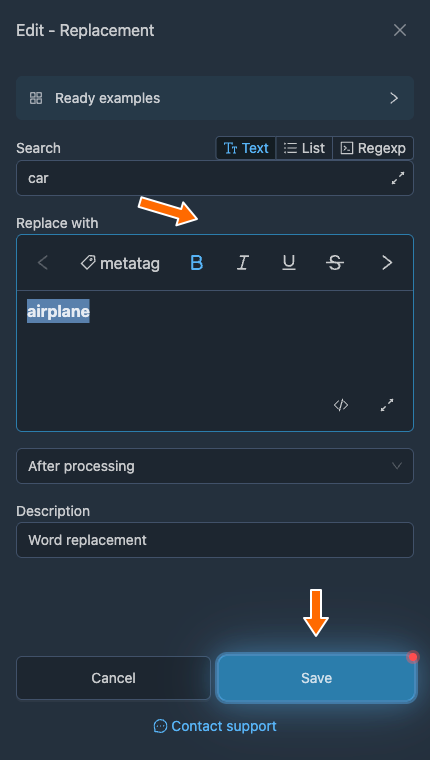
Bold formatting in the visual editor. 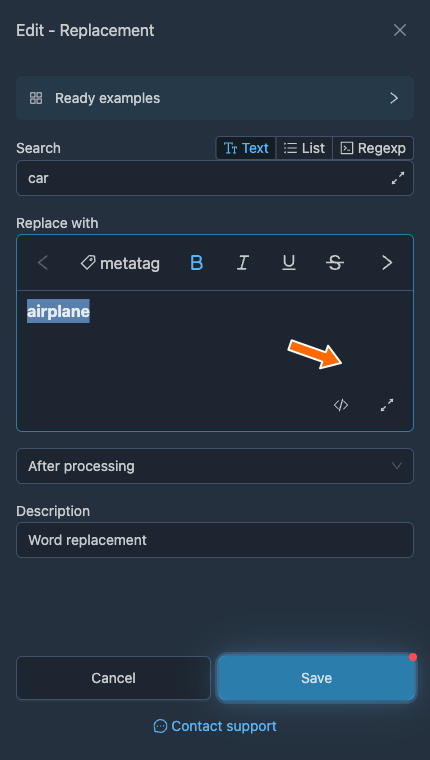
The button for switching to code mode. 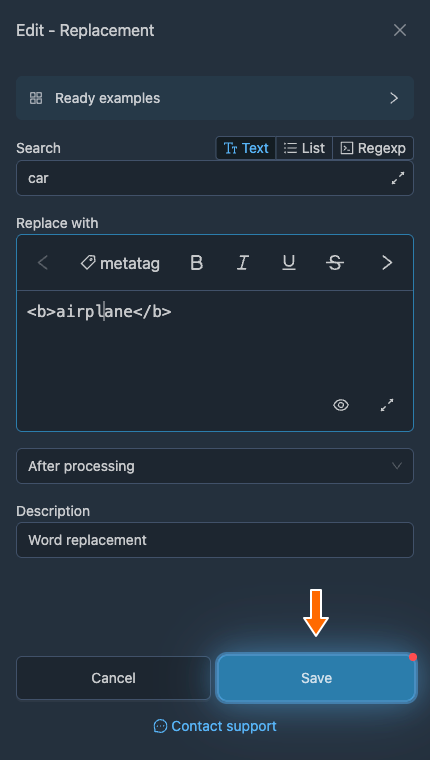
Formatting tags in code mode. - Now, in forwarded messages, the word “car” will be replaced with “airplane” in bold.
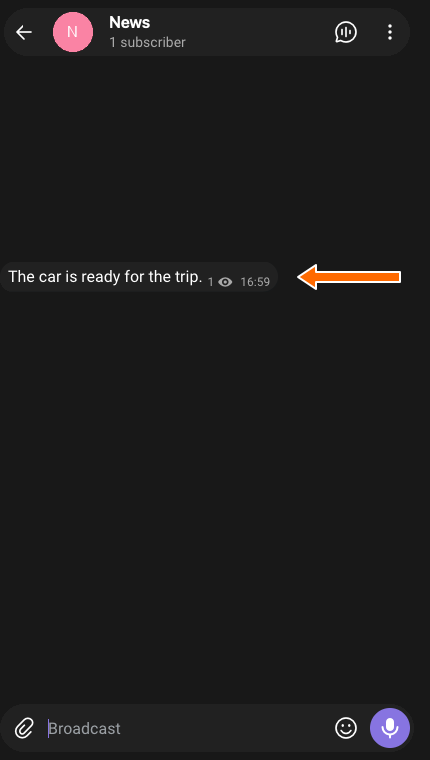
The original message without formatting. 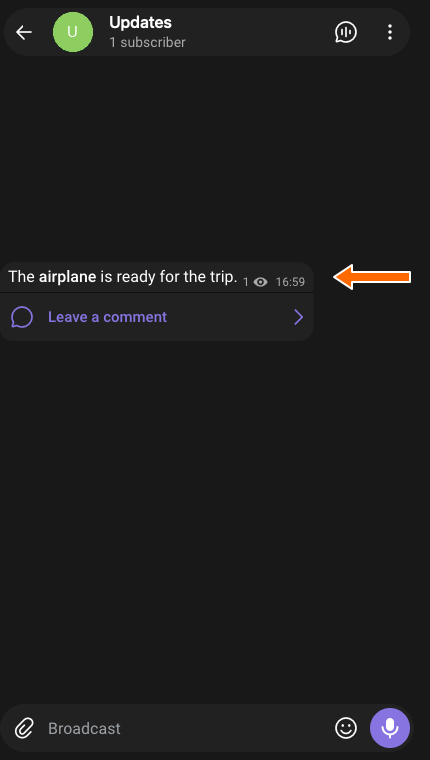
The replaced word's formatting in the destination.
Special metatags
Main metatags
In the replacement settings, you can use special metatags in the “Replace with” field to add metadata to a message, and combine them with formatting tags. The main metatags are listed below:
- message date: <message-date>
- message time: <message-time>
- author ID: <author-id>
- author name: <author-name>
- author name as a link: <author-name-link>
- author name as a tag: <author-name-tag>
- author username: <author-username>
- message text in the source: <src-message-text>
- message ID in the source: <src-message-id>
- link to the message in the source: <src-message-link>
- source chat ID: <src-chat-id>
- source chat name: <src-chat-name>
- source chat username: <src-chat-username>
- topic ID in the source: <src-topic-id>
- topic name in the source: <src-topic-name>
- message text in the destination: <dst-message-text>
- destination chat ID: <dst-chat-id>
- destination chat name: <dst-chat-name>
- destination chat username: <dst-chat-username>
- topic ID in the destination: <dst-topic-id>
- topic name in the destination: <dst-topic-name>
- regular expression: <regexp>(short|sell)</regexp>
- random text: <random>1|2|3|4|5</random>
- content found for replacement: <content>
The “metatag” button opens a searchable list. It also includes the current date and time, message statistics, listener and sender details, and other groups.
Example: a signature linking to the source
- In the replacement editing window, click “Ready examples”. Enter
link to sourcein the search field and select “Add link to source”.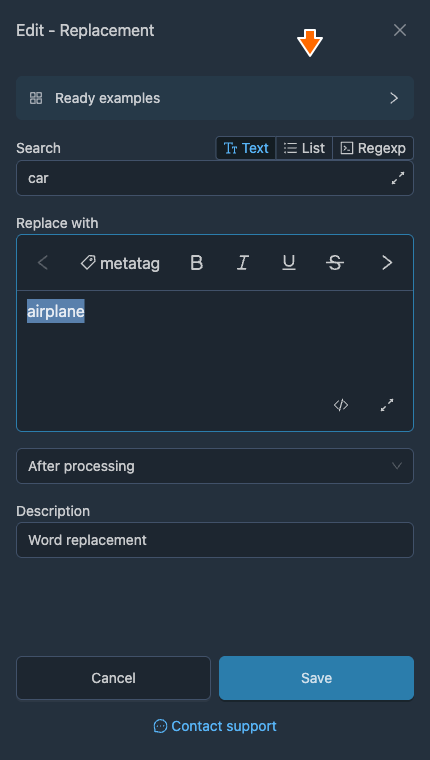
The “Ready examples” button in the replacement editing window. 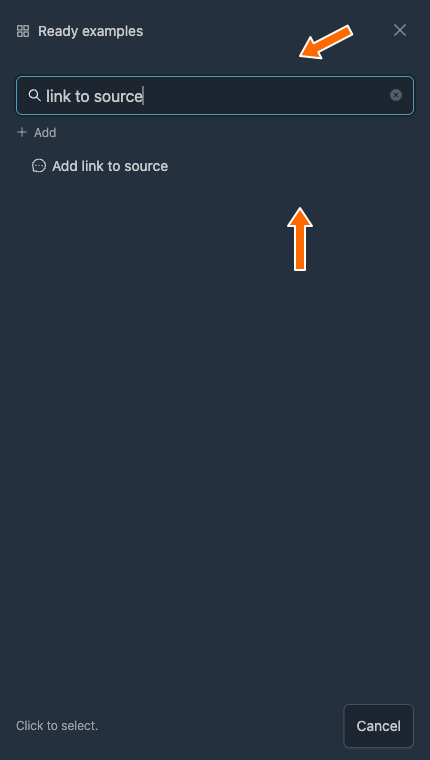
The “Add link to source” ready example. - The fields will be filled automatically: “Regexp” mode and the
$symbol in the “Search” field specify that content should be added to the end of the message. The “Replace with” field will contain the signature “Source:” with metatags for the chat name and the link to the original message. Click “Save”.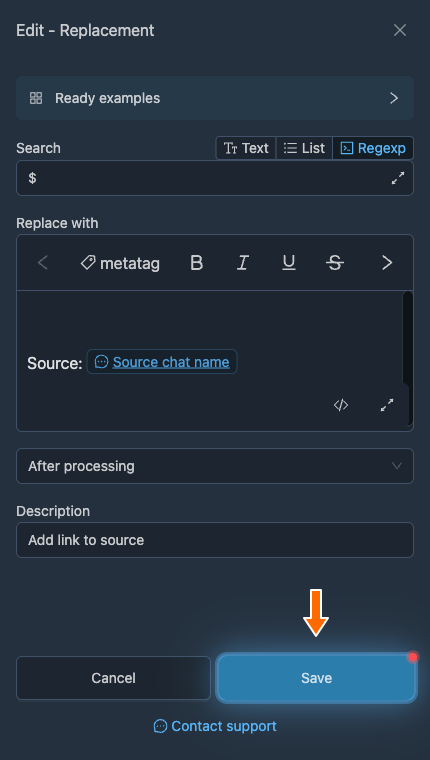
Signature settings filled in by the ready example. - Forwarded messages will now end with a signature containing the source name. Clicking the name will open the original message; the main text will be preserved in full.
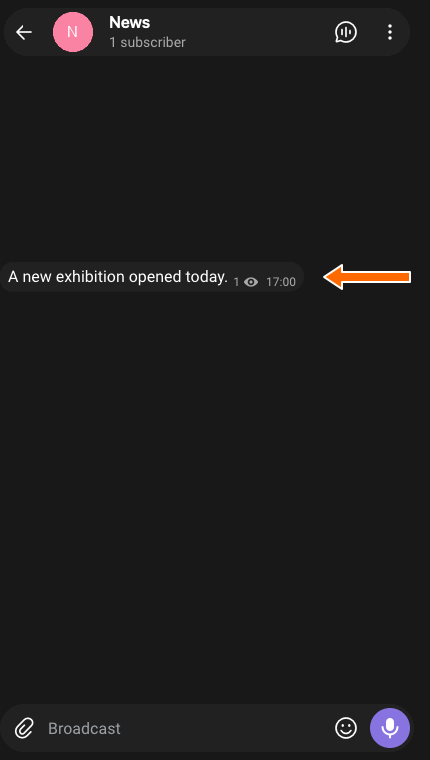
The original message before the signature is added. 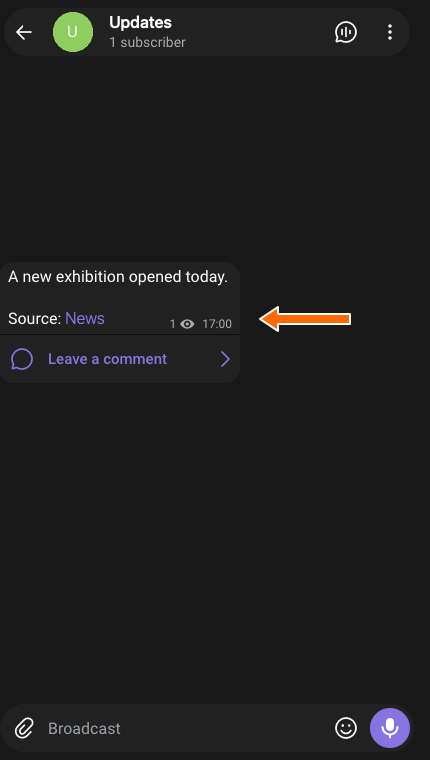
A signature linking to the original message.
Replacing text with premium emoji
To preserve premium emoji when transferring a signature from Telegram to a replacement, use the JSON from @message_inspector_bot. The bot also works for replacements with complex formatting and no premium emoji.
Let's look at how to create a replacement that adds a signature with premium emoji to every forwarded message:
- Open @message_inspector_bot in Telegram. Send it the signature text with the premium emoji and formatting you need, then copy the JSON from the bot's reply.
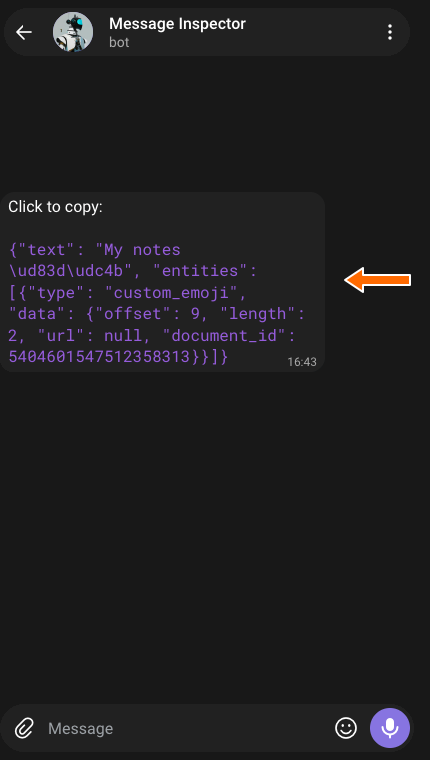
The signature's JSON in the reply from @message_inspector_bot. - Return to the “Replacements” section and click “Create”. In the “Search” field, select “Regexp” and enter
$. This symbol marks the end of the text.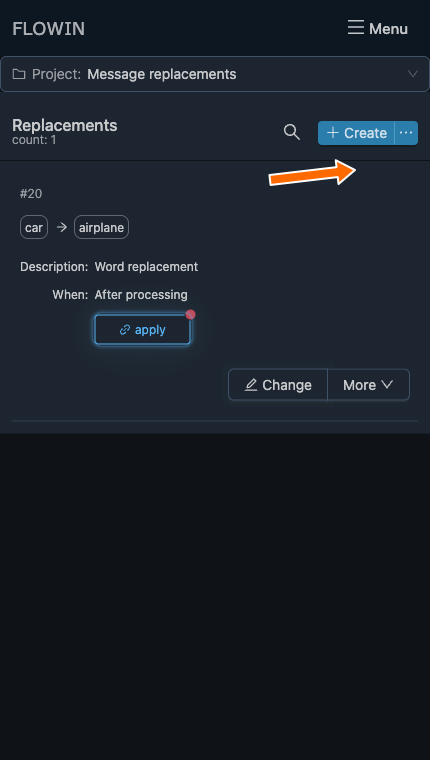
Creating a separate replacement for the signature. 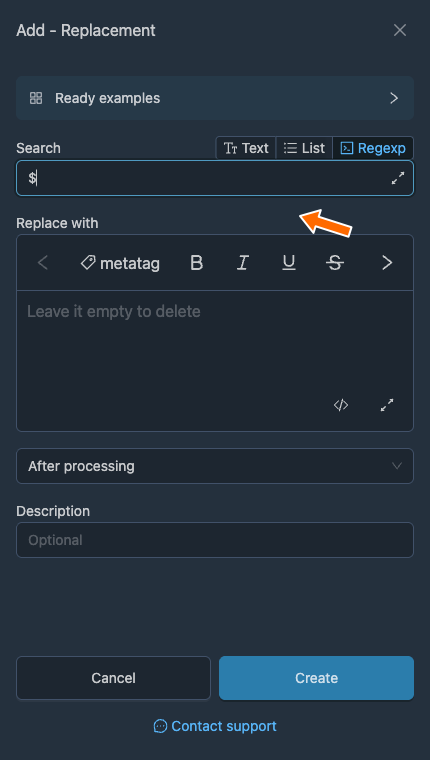
Searching for the end of the message: Regexp and the $ symbol. - In the “Replace with” field, press Enter twice to separate the signature from the message. Click “metatag”, enter
premiumin the search field and select “Formatting and premium emoji from JSON”. Paste the bot's reply into the “JSON” field and click “Insert”.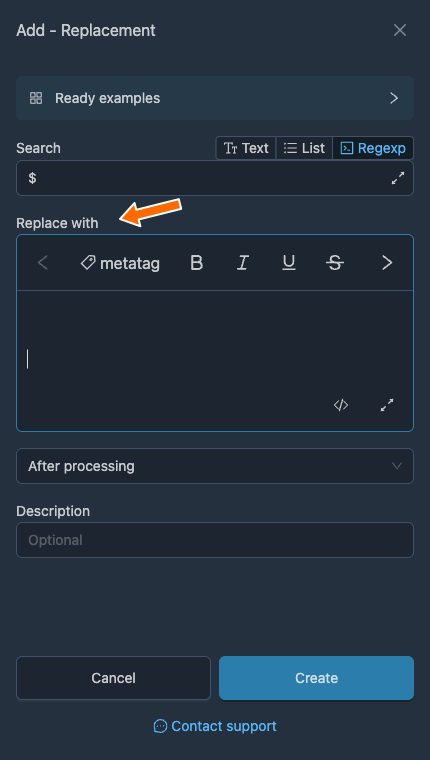
The “metatag” button after two line breaks. 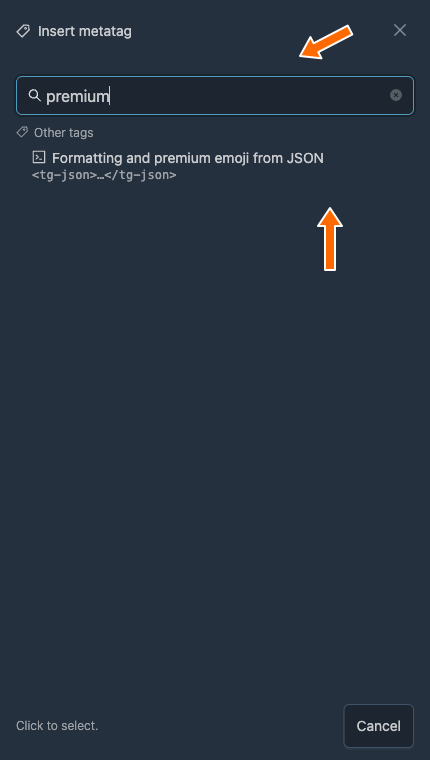
Inserting formatting and premium emoji from JSON. 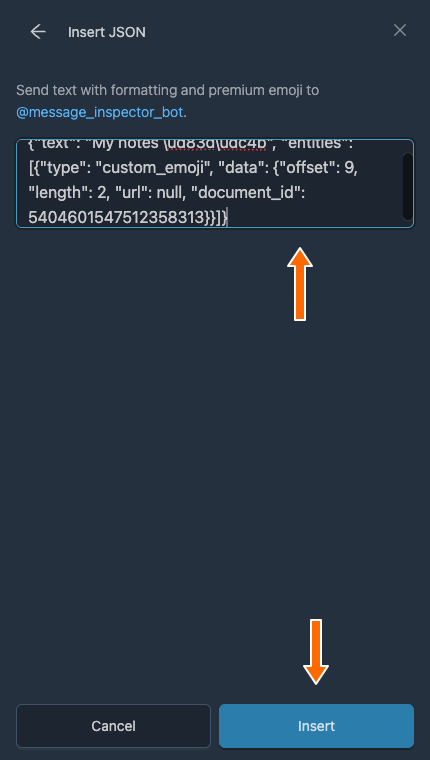
JSON from the bot's reply in the insertion window. - Check that a fragment containing the signature text has appeared in the field and click “Create”. In the new replacement's row, click the blinking “Apply” button, select the forward you need and click “Save”.
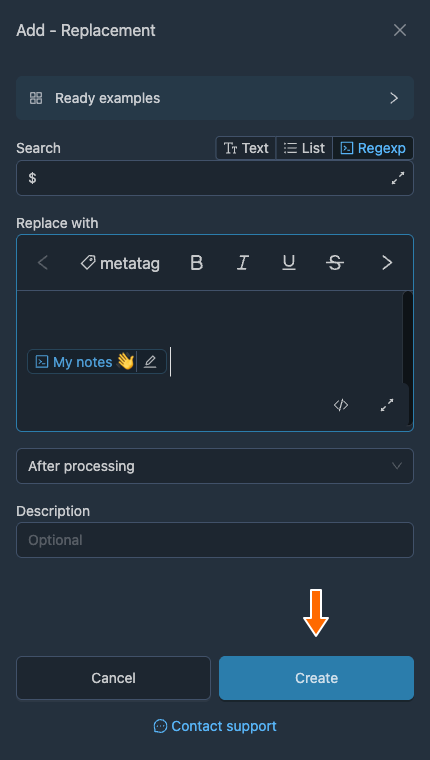
The signature inserted as a separate fragment. 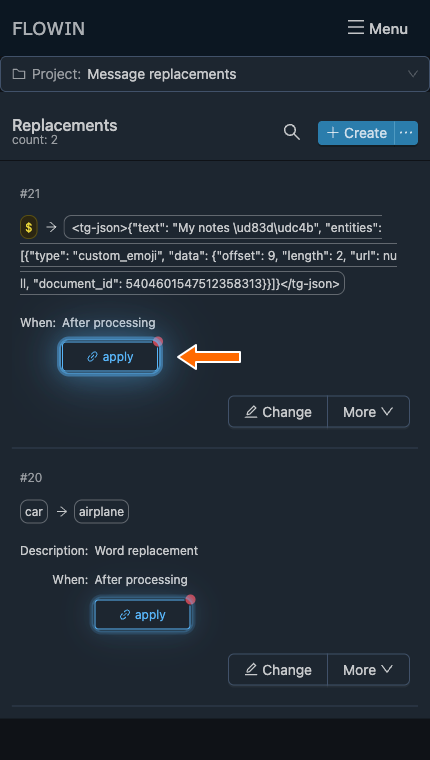
Applying the new replacement with a signature. 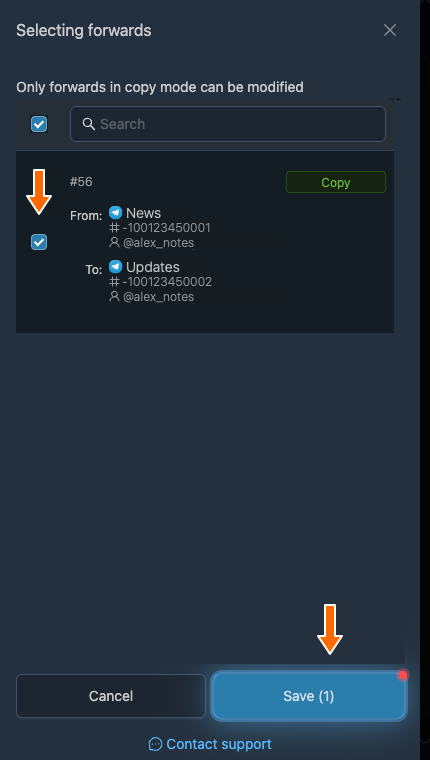
The forward to which the signature applies. - A signature with premium emoji will now be added to all forwarded messages.
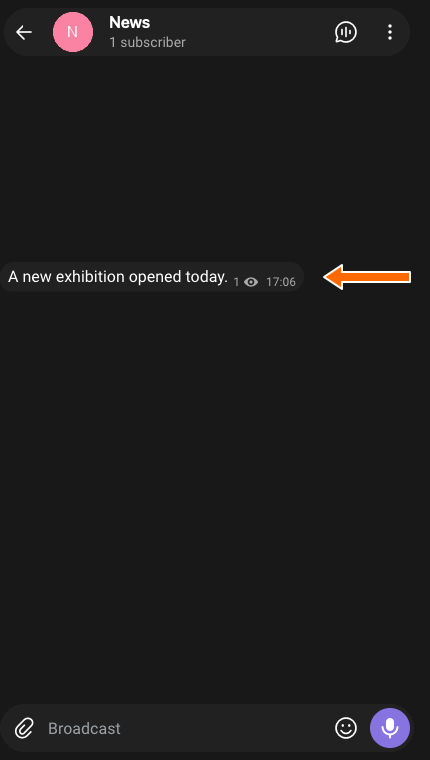
The original message without a signature. 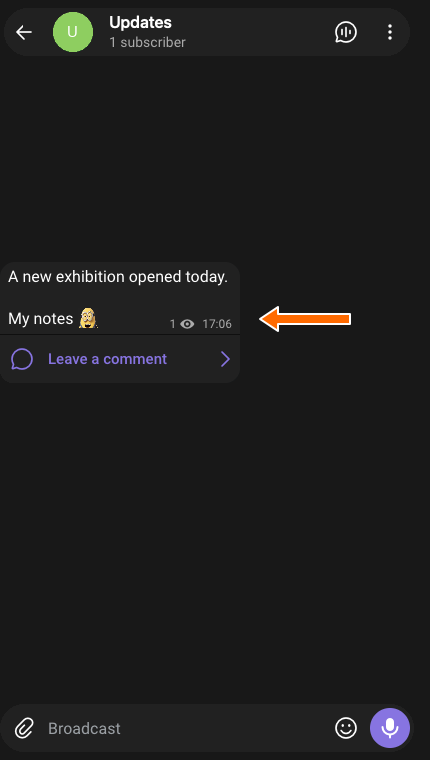
The signature with a premium emoji in the destination.
How to change the signature
The JSON is inserted as a separate fragment. You can add ordinary text, line breaks, formatting and metatags before and after it. To change the signature with premium emoji itself, send the bot a new version and replace the JSON.
Available replacement actions
The “Change” button next to a replacement opens its main settings. The “More” menu provides other actions:
- “Apply”: select the forwards that need the replacement.
- “Duplicate”: create a copy of the replacement with the same settings.
- “Select project”: add the replacement to a project.
- “Delete”: delete the replacement.
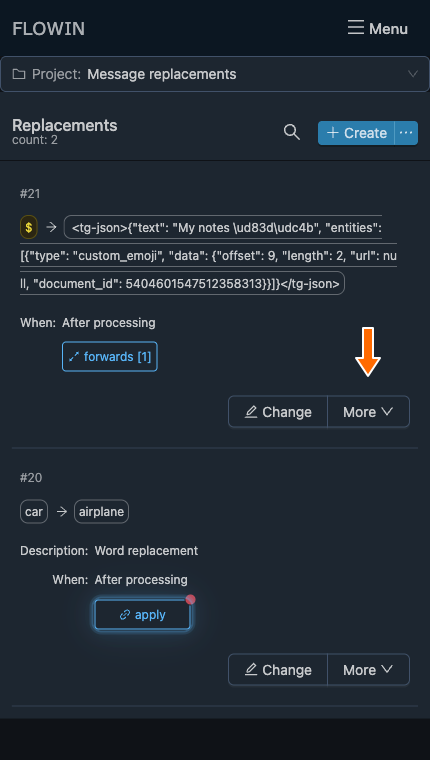
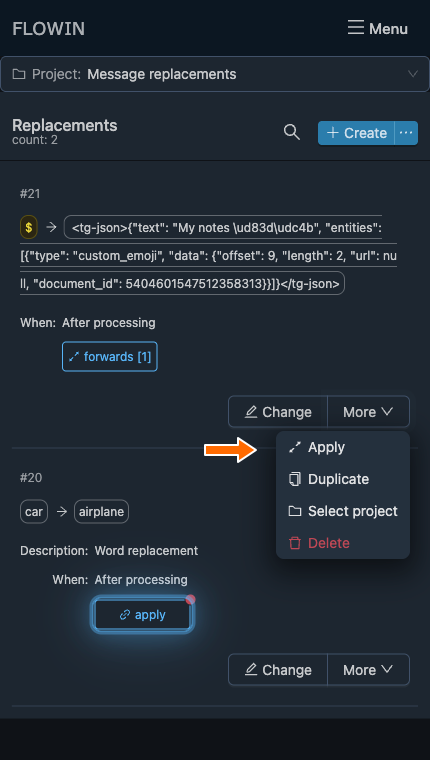
The “Apply” button in the replacement's row also opens forward selection. Once a replacement is linked, this button displays “Forwards [N]” instead, where N is the number of selected forwards.
Frequently asked questions
How do I remove a link from a message's text and keep the rest?
If the address is visible in the message text, enter it in the “Search” field in “Text” mode and leave the “Replace with” field empty. Once you apply the replacement to the forward you need, this address will be removed from copied messages. The rest of the text will be preserved. This method is for a written-out address, not a link hidden behind words.
Do I need to list uppercase and lowercase versions of words separately?
No. In “Text” and “List” modes, the search is case-insensitive: one version is enough for both “Car” and “car”. It searches for a character sequence that may also occur within a longer word. If you need whole words only, use “Regexp” mode with word boundaries.
How do I add a signature without replacing the original text?
In “Regexp” mode, the $ symbol in the “Search” field marks the end of the message. Text from the “Replace with” field will be added at that point, and the main text will remain intact. “Ready examples” includes options for adding signatures; the example with a source link shows the setup and result.
How do I link to the original post rather than the author?
Use the <src-message-link> metatag: it inserts a link to the original message. The <author-name-link> metatag creates a link to the author, while <src-chat-name> inserts the source chat's name. The “Add link to source” ready example combines the chat name and a link to the original post.
Why does translation or AI change the signature I added?
If the replacement is set to “Before processing”, the signature is added before translation and AI processing. Both receive the text with the signature already included and may change it. To add the signature to the finished result, select “After processing” for this replacement. The signature will appear after translation and AI processing; other late replacements can still change it.